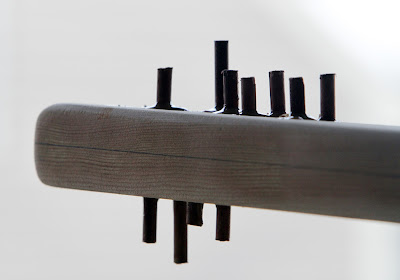
The WEST system epoxy fired off very nicely this afternoon on day one of a two day epoxy project. Today, a warm day that started out with a mist but then cleared for a sunny afternoon, involved completing the sanding of the bow sprint, rub rails, boomkin and rudder; drilling out the old screw holes with a quarter inch bit; using a rubber maul to tap quarter inch epoxy coated mahogany dowels into the freshly drilled holes for a solid hardwood finish. Below is the bow sprit. Tomorrow I'll cut the dowels flat with the surface, re-sand and then give the bare wood a clear coat of epoxy.
Speaking of woodwork, check out the very nice Pathfinder below that Greg is building in Mooi River, South Africa. Greg sent the photo along with a request for information about the ballast I use for Spartina. (Why is it that of all photos of Pathfinder builds that are sent to me, I find that the Pathfinder with the poorest finish and roughest woodwork is the one sitting out in my garage??)
From what I hear, Spartina has more ballast than most of the Pathfinders out there. The centerboard is a steel plate that comes in at almost exactly 100 pounds. Then on each side of the centerboard trunk, beneath the bunk flat, are two 15 pound dumbbells. They sit on a hardwood panel and are held into place by a bit of line and a line cleat.
A little math says total ballast is 160 pounds, which seems just right for my kind of sailing whether day sailing or on a cruise with lots of gear aboard. The dumbbells were originally bought because they were the cheapest way to buy lead, but their shape made them easy to fasten in place. And there is still plenty of room in the space underneath the bunk flat for eight gallons of water, a tool kit, spare anchor, chain and rode.
When Greg asked about the ballast I had to go take a look to see how it was mounted. It has been six years since I built Spartina and I've forgotten a lot of the details. It was the same when Stuart of Dabbler Sails asked me about the goosenecks for the main and mizzen boom. He's asked for some detailed information so he can properly cut the new set of sails for Spartina. I had to do soem digging through a drawer of old paperwork to find out where I got the fittings.
They came from Bristol Bronze of Tiverton, R.I. In the scan from the Bristol Bronze catalog above you can see the gooseneck for the main at top and the one for the mizzen just below. Both sit on 5/8 inch tracks. What I recall is that Roger, owner of Bristol Bronze, owns a couple of classic yachts and has made casts of the hardware on those boats that he now reproduces and sells. It is top rate gear and I'm very happy with it. There are a lot of words to describe his hardware - "classic", "solid", "well-made"....... "cheap" and "inexpensive" are not in that group. I did spend more than a few bucks at Bristol Bronze, but it was a good investment.
Now that I've found the drawings, I'll take a couple of photographs of the goosenecks, make some measurements and forward all the information to Stuart at the sail loft.
After a good day's work little neck clams, shrimp, Mediterranean vegetables and linguini are on the menu for tonight. And a nice dry chardonnay too.
steve












2 comments:
Looks like your sailmaker is asking all the correct questions, getting the tack offset, etc. :)
Are the plugs to give the screws some fresh wood to bite into when you re-install? On fiberglass boats, sometimes we overdrill holes (say a 1/2" hole for a 1/4" bolt) for thru-bolted fittings and fill the hole with epoxy & let it cure. Then drill out your 1/4" hole and insert your bolt..essentially the same thing you are doing. That keeps any moisture from wicking into the wood core in the deck. When I removed my chainplates I had a lot of core rot around them..The chainplates went back thru the deck thru a big blob of solid epoxy.
Keep up the good work..you are making lots of progress already!
Cheers,
Shawn
Yes, Shawn, just looking for some fresh wood. It is easy to do, sands out very smooth and even. Very little moisture around the existing screw holes as I had been with silicon sealant. That lasted well for seven seasons. Figured I would start again with fresh wood anyway.
steve
Post a Comment